
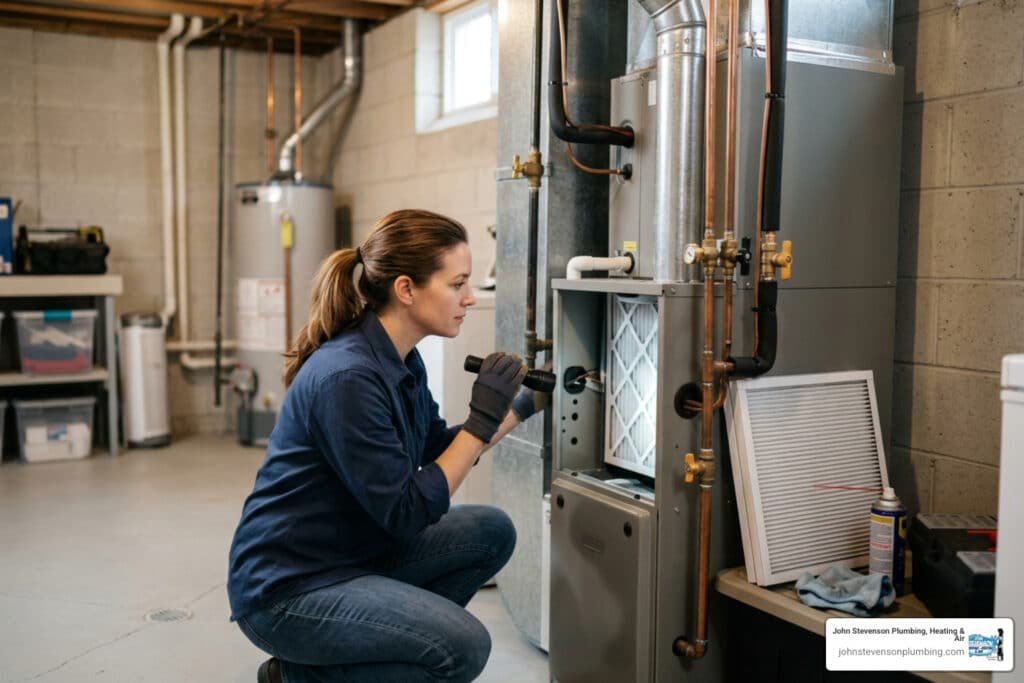
Why Preparing Your AC for Summer in Carlsbad Starts Before the Heat Hits
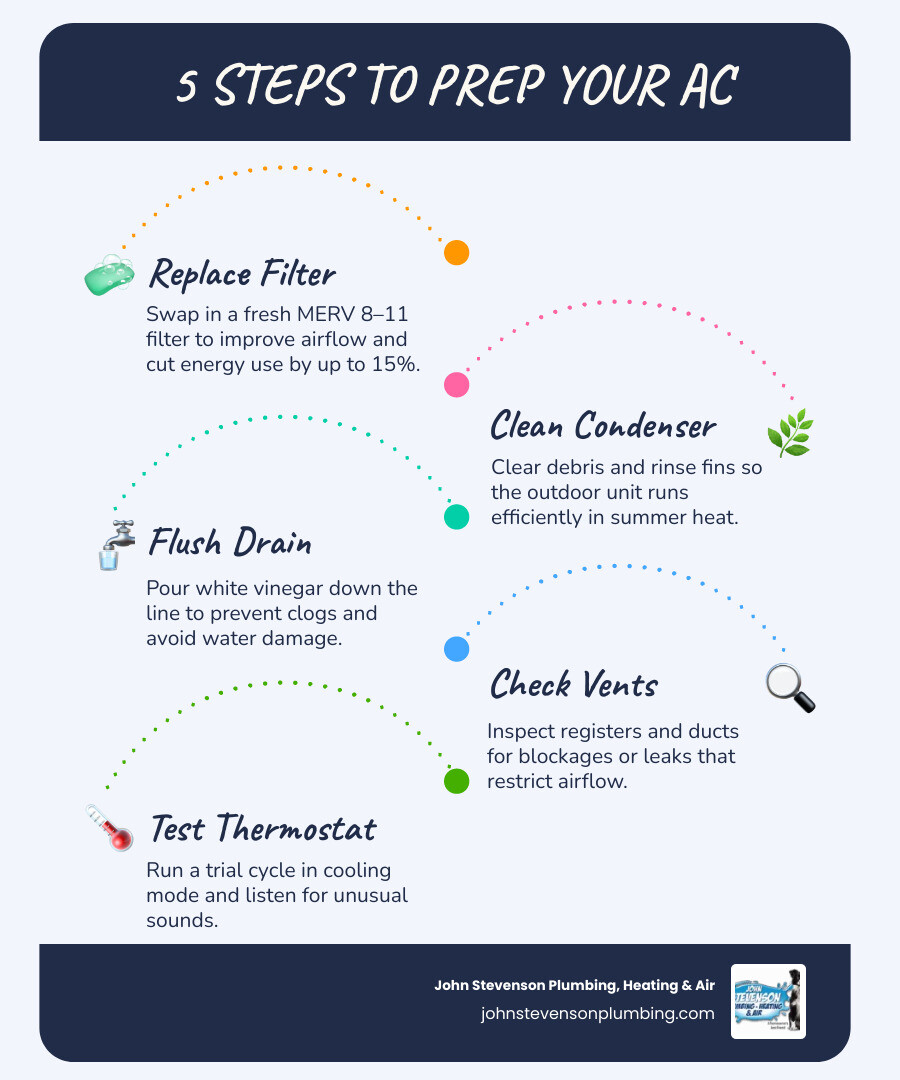
Knowing how to prepare your AC for summer can be the difference between a cool, comfortable home and an emergency repair call on the hottest day of the year. Here are the five core steps every Carlsbad homeowner should take before summer arrives:
- Replace the air filter — swap in a fresh MERV 8–11 pleated filter
- Clean the outdoor condenser unit — clear debris and rinse the fins
- Flush the condensate drain line — pour white vinegar down the access point to prevent clogs
- Inspect vents, registers, and ductwork — check for blockages and obvious leaks
- Test your thermostat and run a trial cycle — confirm cold airflow and listen for unusual sounds
Southern California summers don’t ease in slowly. In Carlsbad and across San Diego County, temperatures climb fast — and a system that sat unused all winter is one of the most common reasons homeowners get caught off guard. A poorly maintained air conditioner can waste up to 20% more electricity than a clean, well-serviced one, and a clogged filter alone can push energy use up by 5 to 15 percent. A few simple steps taken now can prevent a breakdown later and keep your cooling bills under control all season long.
Why Learning How to Prepare Your AC for Summer Matters
When the coastal marine layer burns off and the inland valley heat spikes, your air conditioner becomes the most important appliance in your home. Skipping seasonal prep doesn’t just risk a mid-July breakdown; it actively drains your wallet.
Without proper care, your cooling system has to work significantly harder to pull heat out of your home. Over time, dust, salt air from our beautiful Carlsbad beaches, and inland pollen accumulate on the delicate internal components. This buildup acts as an insulating blanket, forcing the system to run longer cycles to reach your target temperature.
The Financial and Operational Impact of AC Maintenance
Regular maintenance directly impacts three critical areas of home ownership:
- Energy Efficiency: A clean, well-calibrated system uses less electricity to produce the same amount of cool air.
- System Lifespan: Reducing operational strain prevents premature wear on expensive parts like the compressor and fan motor. Understanding How to Extend the Life of Your AC Unit starts with consistent seasonal care.
- Utility Bills: Lower energy consumption translates directly into lower monthly power bills.
If you let your system sit dormant through the winter without a proper transition, you are essentially launching it into a high-demand season without preparation. Learning How to Prep Your HVAC for the Spring Thaw ensures that your system transitions smoothly into the warmer months of June 2026.
To illustrate the difference simple maintenance makes, consider the performance comparison below:
| Performance Metric | Well-Maintained AC System | Unmaintained AC System |
|---|---|---|
| Energy Consumption | Baseline (Optimal Efficiency) | Wastes up to 20% more electricity |
| Airflow Capacity | 100% unrestricted | Reduced by 10% to 30% (clogged filters/ducts) |
| Coil Heat Transfer | Maximum heat rejection | Reduced by 20% to 30% due to dirty coils |
| Average Cooling Cycle | Efficient 15–20 minute cycles | Constant running or rapid short-cycling |
| Lifespan Expectation | 15+ years of reliable service | Premature failure within 8 to 10 years |
The 5-Step DIY AC Preparation Checklist
Preparing your cooling system for the summer heat doesn’t have to be intimidating. Many of the most impactful maintenance tasks are entirely within the reach of a proactive homeowner. Before we dive into the steps, let’s establish the absolute baseline of DIY HVAC care: Safety first.
Never perform any maintenance or inspections on your air conditioner while the system is powered on. Before touching any interior or exterior components, turn off the power at three distinct points:
- The Thermostat: Turn the system completely “Off.”
- The Disconnect Box: Locate the metal box mounted on the exterior wall near your outdoor condenser unit. Open it and pull the physical disconnect plug or flip the built-in switch to “Off.”
- The Main Service Panel: Locate your home’s main electrical breaker box and switch off the dedicated breaker labeled for your air conditioner.
Once the power is fully cut, you can safely proceed with our 5-step checklist.

Step 1: Replace the Air Filter to Prepare Your AC for Summer
The single most effective DIY task you can perform is replacing your air filter. A clogged, dirty filter restricts airflow, forcing your system’s blower motor to work twice as hard. This restriction can cause your cooling coils to freeze over, completely halting the cooling process.
When selecting a new filter, pay attention to the Minimum Efficiency Reporting Value (MERV) rating:
- MERV 1 to 4: Typically basic fiberglass filters. They stop large particles but do very little to protect your indoor air quality or system coils.
- MERV 8 to 11: The sweet spot for residential homes. These pleated filters capture dust, pollen, pet dander, and mold spores without restricting airflow in modern systems.
- MERV 13 and higher: Excellent for filtration, but they can be too restrictive for standard residential HVAC systems, causing pressure imbalances.
Regularly swapping your filter protects your system from breakdown and preserves your respiratory health. For a deeper look at this simple task, read our guide on Why You Need to Swap Your Air Filter This Spring.
Step 2: Clean the Outdoor Condenser Unit
Your outdoor condenser unit is responsible for releasing the heat extracted from inside your home. If the metal fins of the condenser are coated in dirt, grass clippings, or leaves, that heat remains trapped, and your home won’t cool efficiently.
First, clear away any physical blockages. Maintain at least a 2-foot clearance zone around the entire unit. Trim back any bushes, weeds, or overhanging branches that grew during the rainy winter and spring months.
Next, give the unit a gentle rinse. Using a standard garden hose with a spray nozzle on a light, downward setting, rinse the metal fins from the top down. Never use a pressure washer. High-pressure water will instantly bend the delicate aluminum fins, blocking airflow and permanently damaging the unit. If you spot any bent fins, you can use a specialized HVAC fin comb to gently straighten them back into place.
Step 3: Clear and Flush the Condensate Drain Line
As your air conditioner cools your home, it also dehumidifies the air. The moisture collected from your indoor air drips into a drain pan and flows outside through a PVC condensate drain line. During the winter, dust, mold, and algae can settle inside this line, forming a thick clog.
When you turn your AC on for the summer, that water has nowhere to go. It will quickly back up, overflowing the drain pan and causing expensive water damage to your ceilings, walls, or floors.
To prevent this:
- Locate the T-shaped access point on your indoor drain line (usually near the indoor evaporator coil).
- Pour one cup of distilled white vinegar down the line.
- Let it sit for 30 minutes to break down any algae or fungal growth.
- Flush the line with warm water to ensure it flows freely to the outdoor exit point.
Step 4: Inspect Vents, Registers, and Ductwork
Go room by room through your house and inspect all supply vents (which blow cool air in) and return grilles (which pull warm air out). Ensure they are completely open and unblocked by furniture, drapes, or toys.
Note on a common myth: Many homeowners close vents in unused rooms thinking it saves energy. In reality, modern central AC systems are engineered to move a specific volume of air. Closing vents increases the pressure inside your ductwork, which can lead to leaks, strain the blower motor, and actually reduce system efficiency.
While checking your vents, perform a visual inspection of any accessible ductwork in your attic, basement, or crawlspace. Look for loose joints, fallen insulation, or tears. The average home loses 20% to 30% of its conditioned air through leaky ductwork, so sealing these gaps can dramatically improve your comfort and utility bills.
Step 5: Test Your Thermostat and Run a Trial Cycle
Before the first true heatwave hits, you need to stress-test your system under controlled conditions.
If your outdoor unit’s breaker has been turned off all winter, follow the 24-hour rule: flip the breaker back on at least 24 hours before you plan to run the cooling cycle. This allows the heating element in the compressor to warm up the internal lubricant, preventing a dry “hard start” that can damage the motor.
Once 24 hours have passed:
- Check your thermostat batteries and replace them if they are more than a year old.
- Switch the thermostat to “Cool” and set the temperature 5°F below the current room temperature.
- Listen for the indoor blower and outdoor fan to start up smoothly.
- Let the system run for 15 to 20 minutes.
- Feel the air coming out of the vents. It should feel consistently cool, and you shouldn’t hear any squealing, grinding, or rattling noises.
When to Skip DIY and Schedule a Professional AC Tune-Up
While DIY maintenance is incredibly valuable, there are limits to what a homeowner can safely and legally do. Air conditioners are complex machines that rely on high-voltage electricity and pressurized chemical refrigerants.
Handling refrigerant requires specialized tools, training, and EPA Section 608 certification. Attempting to bypass these safety protocols can result in severe personal injury, system damage, or voided equipment warranties.
Scheduling a professional inspection before the peak summer rush ensures that your system’s critical mechanical and electrical components are thoroughly evaluated. To understand why this early preparation is so vital, explore The Secret to a Stress-Free Summer is a Spring HVAC Tune-Up.
Warning Signs Your System Needs Repair, Not Just Maintenance
If you perform your initial trial run and notice any of the following symptoms, your system likely requires a professional repair rather than just routine maintenance:
- Weak Airflow: If you can barely feel air coming from the registers, you may have a failing blower motor or severe duct obstructions.
- Warm Air at the Vents: If the air blowing out of your vents remains lukewarm after 15 minutes, your system isn’t cooling properly. Check our guide on What to Check First When Your AC Runs Constantly Without Cooling for immediate troubleshooting steps.
- Short-Cycling: If your AC turns on and off rapidly every few minutes, it is experiencing abnormal system strain that can quickly burn out the compressor.
- Unusual Noises: Grinding, squealing, banging, or hissing sounds indicate mechanical wear or refrigerant leaks.
- Ice on the Refrigerant Lines: If you notice ice forming on the copper lines leading to your outdoor unit, your system has restricted airflow or low refrigerant.
If your system is showing these signs or is simply getting up there in years, it might be time to evaluate whether to fix it or replace it entirely. Take a moment to read How to Decide If Your AC Needs a Tune-Up or a Retirement Party to make the best choice for your home.
Professional Steps on How to Prepare Your AC for Summer
When a certified technician from John Stevenson Plumbing, Heating & Air Conditioning performs a professional tune-up, they handle the advanced technical tasks that keep your system running safely:
- Refrigerant Level Check: We measure the pressure and temperature of your refrigerant to ensure there are no leaks and that the system is charged to precise manufacturer specifications.
- Electrical Component Testing: We inspect and tighten all wiring connections, measure voltage, and test capacitors. A failing capacitor is the number one cause of summer system failures, and catching a weak one in spring prevents an emergency breakdown.
- Delta T Measurement: We calculate the temperature difference between the return air entering the system and the supply air leaving it. A healthy system should achieve a “Delta T” temperature drop of 15°F to 22°F.
- Bower Assembly Calibration: We clean and balance the fan blades and check the motor amp draw to ensure smooth, efficient operation.
Frequently Asked Questions About Summer AC Prep
How often should I replace my AC filter during the summer?
During peak cooling season, you should check your air filter every 30 days. For standard 1-inch pleated filters, expect to replace them every 1 to 3 months.
However, you should replace them monthly if you have pets, suffer from seasonal allergies, or live in high-dust areas. Keeping a few spare filters on hand ensures you can make a quick swap whenever the filter begins to look gray or dusty.
Why is my AC blowing warm air during the initial test?
If your system runs but only blows warm air, the most common culprits are a completely clogged air filter, a tripped outdoor breaker, or a refrigerant leak. Verify that the outdoor unit is actually running and that the filter is clean.
If the outdoor unit is running but the air remains warm, you may have a refrigerant leak or a compressor issue. Since resolving these problems requires professional diagnostics, we recommend reviewing the financial considerations in Doing the Math on Old AC Repair vs. Buying a New System and checking Will Your AC Survive the Decade? Average Lifespans Explained to see if an upgrade makes more sense for your home.
Should I cover my outdoor AC unit during the off-season?
Generally, no. Modern outdoor AC units are specifically designed to withstand rain, wind, and harsh outdoor elements.
Wrapping your entire unit in a plastic or vinyl cover is actually counterproductive. It traps moisture inside, which accelerates rust and corrosion on the electrical components. Additionally, fully enclosed covers create a warm, dry shelter that invites rodents to nest and chew through critical wiring. If you want to protect your unit from falling leaves or debris during the winter, place a simple piece of plywood over the top of the unit, leaving the sides completely open.
Keep Your Cool with Carlsbad’s Trusted HVAC Experts
Taking the time to prepare your air conditioner before the summer heat hits is one of the smartest decisions you can make as a homeowner. By following these simple DIY steps and knowing when to call in the professionals, you can enjoy lower utility bills, a longer system lifespan, and complete peace of mind all summer long.
At John Stevenson Plumbing, Heating & Air Conditioning, we have spent years keeping homes comfortable throughout Carlsbad, San Diego County, and surrounding communities. Every service we perform is backed by our signature 5-Star Service Guarantee, which includes thorough diagnostics, upfront pricing, certified technicians, and a 24-hour satisfaction check-in.
Whether you need a quick pre-season tune-up, an emergency repair, or a complete system replacement, our team is ready to help. If you live in our northern service areas, don’t hesitate to check out our specialized Orange County AC Maintenance options. Contact us today to schedule your professional tune-up and ensure your home remains a cool sanctuary all summer long!